9-Patch是Android设备上处理可扩展图片的方式。众所周知,Android设备的屏幕尺寸和分辨率众多,为了图片能完美的适配各种屏幕,Android采用了支持可扩展的图片的方案。
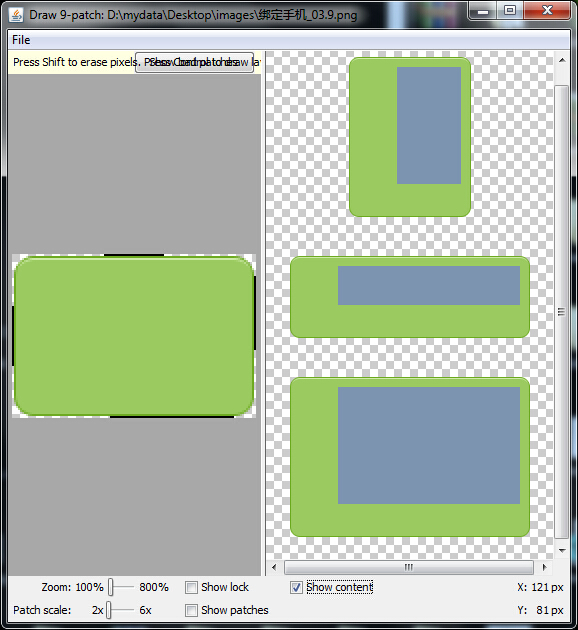
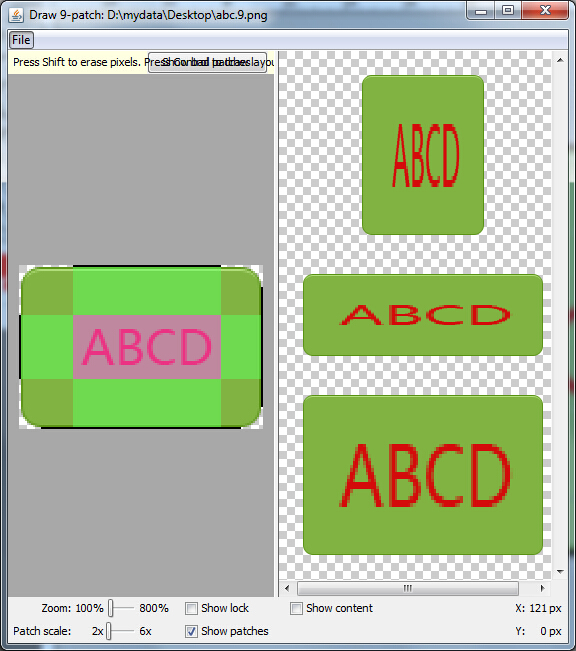
9-Patch的使用非常简便。围绕在图片周围的黑线便是定义之处。关于此格式需要注意的地方:
- png图片的一周有 1px的边框,用于定义可扩展区域和静态区域(黑线)
- 图片一周,黑线标识可扩展区域,黑线必须是 纯黑 (#000),不透明的,添加深灰色的线都不能起作用,其它区域必须是完全透明或者纯白色。
- 可以使用任意图片处理工具处理,比如Windows的画板(MS Paint)也没有问题
- 保存时使用扩展名 .9.png
下面说明黑线的作用。
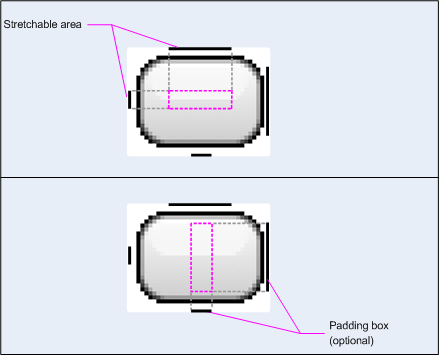
Top和Left
Top和Left定义了将要被拉伸的部分。要注意的点:
9-Patch图 只能拉伸,不是整块复制,不能收缩
同一边可以定义多个区域,使用时将按照区域的宽度等比例拉伸
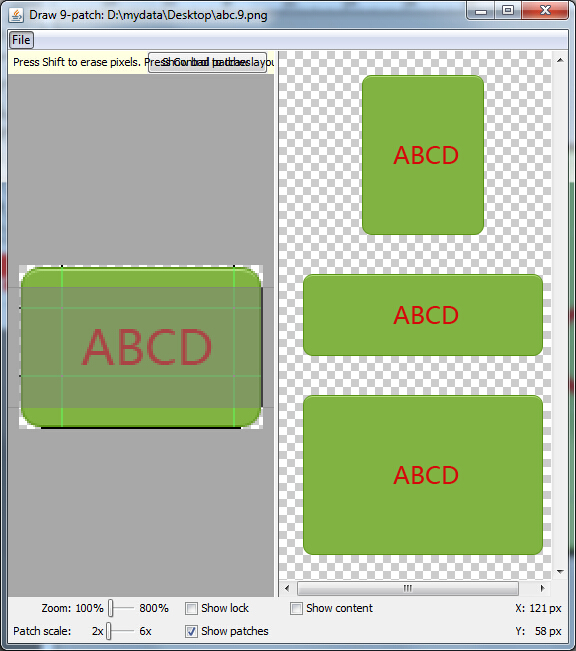
Right和Bottom
Right和Bottom定义了内容的区域。